
By Moritz Teufel · 5 min. read · Last updated: 5/6/2026
In this article, we present 10 valuable tips to optimize your Discord server and get the most out of the platform. Discord is a popular communication platform for gamers, communities, and various interest groups. With our practical advice, you can take your server to the next level and create a welcoming, active, and well-organized environment.
About Discord
The founders of Discord simply wanted a way to talk to their gamer friends. They ended up creating something much bigger. Most long-time Discord users have a similar origin story. They enjoyed playing video games with friends and used tools like TeamSpeak or Skype to communicate during gameplay. Most people didn’t like those tools, but they were the only real options.
At some point, many gamers realized something: they wanted to talk to their gaming friends even when they weren’t playing—and about more than just games. Their gaming friends were real friends. As luck would have it, a new tool called Discord appeared in early 2015. Its slogan was clear: "It’s time to ditch Skype and TeamSpeak." It offered text chat, which was great—but most importantly, it handled voice chat better than anything else.
Creating a Server
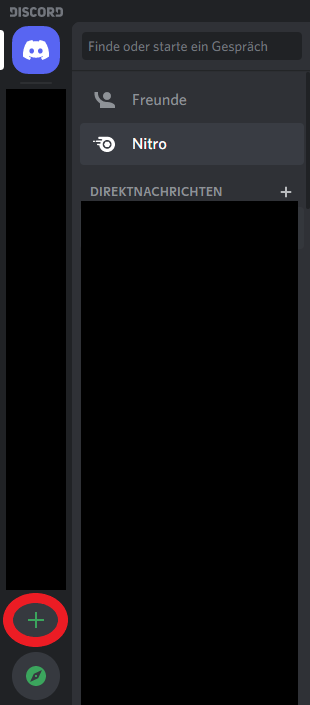
Creating a Discord server is very simple. First, download Discord (Windows, macOS, Linux, iOS, or Android) or open the web interface. In either case, you’ll need to create a free account to get started.
Create Discord Server – Step 1
When you open Discord for the first time and log in, you’ll be asked whether you want to create a server or join one. If you’ve already skipped this screen, you can create a new server by clicking the large plus button in the interface.
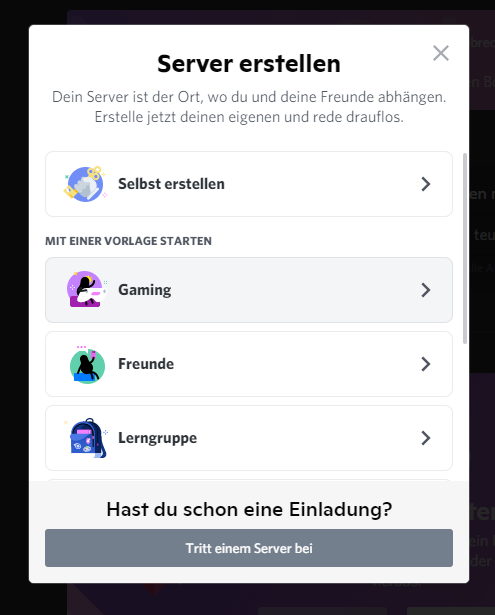
In both cases, you’ll see the same screen. Click “Create Server” to proceed.
Create Discord Server – Step 2
Give your server a name, select the appropriate region if it isn’t detected automatically, and click “Create.”
Your new server will be created, and you’ll be automatically connected. You can now select it from the left sidebar and click the dropdown arrow next to its name to access options like inviting friends, adjusting settings, creating channels, and more.
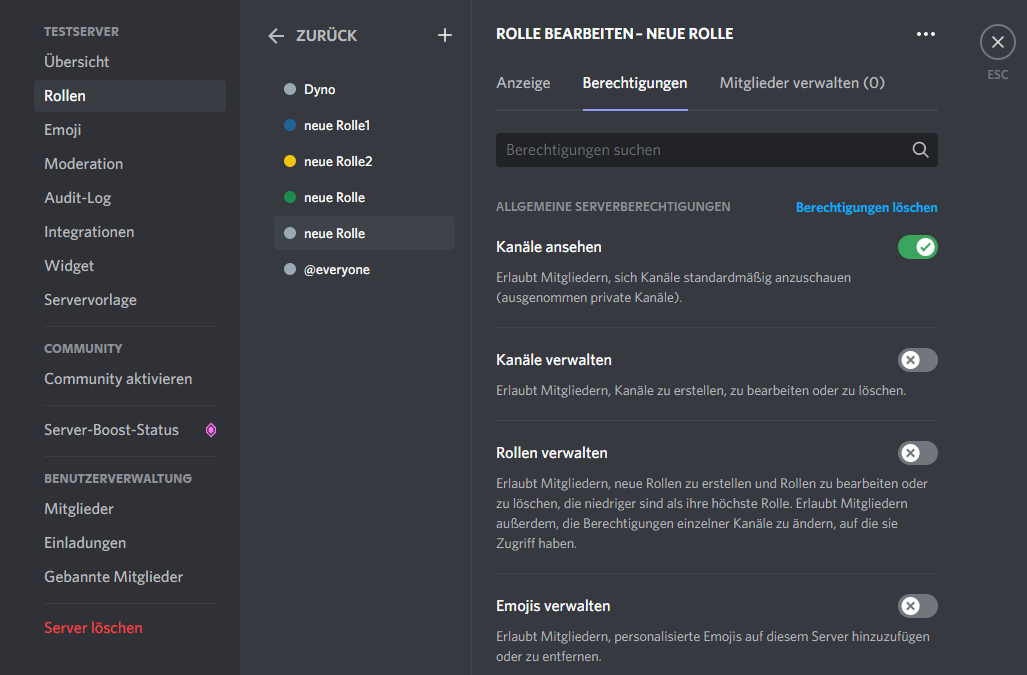
Setting Up Roles and Permissions
Roles are one of the core elements of managing a Discord server. They give members a color, but more importantly, each role has a set of permissions that determine what members can and cannot do.
With roles, you can grant members and bots administrative rights such as kicking or banning users, adding or removing channels, or pinging @everyone.
These options can be found under “Roles” in the server settings.

Server Settings
Role Overview and Editing Options
Permissions should be assigned carefully. Some permissions allow members to make changes to the server and its channels. These are powerful moderation tools, but they should only be granted to trusted users. Changes made to the server cannot always be undone.
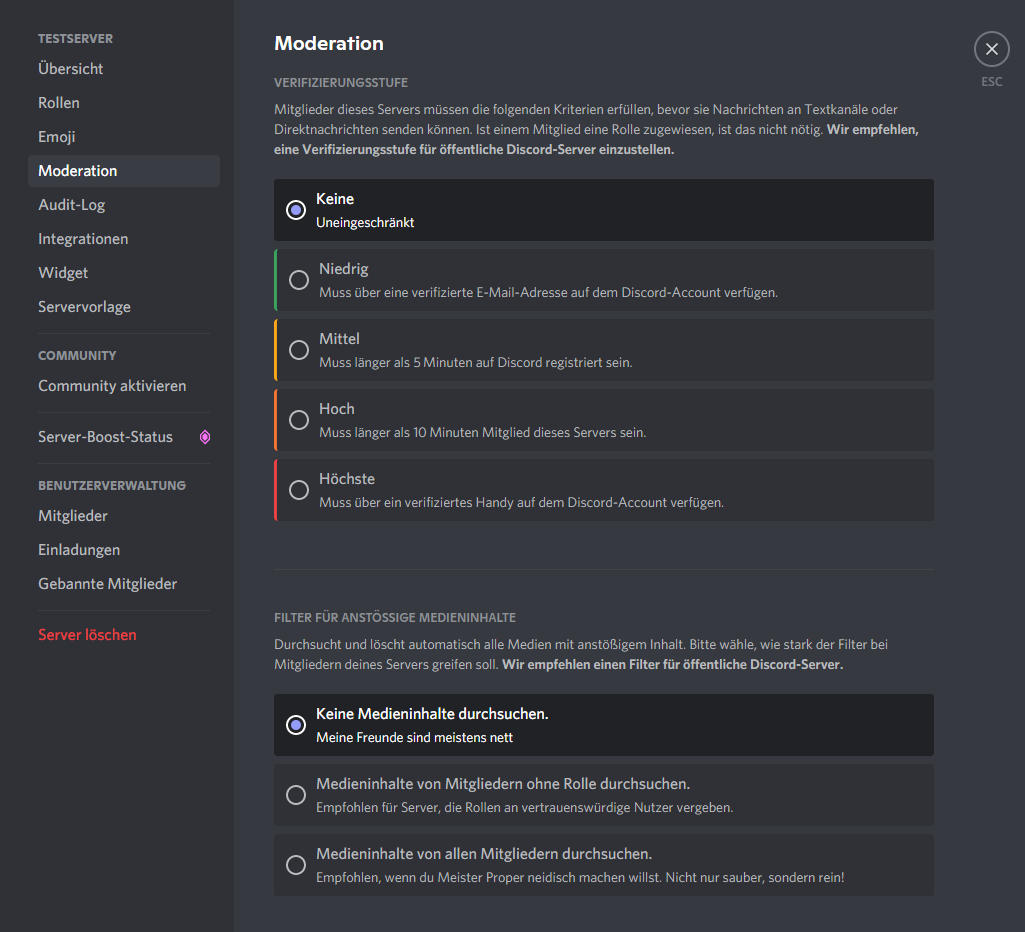
Set a Verification Level
Server verification levels control who can send messages on your server. Setting a higher level is a great way to protect your server from spam or raids.
You can find this option under “Moderation” in the server settings.
Verification Levels:
- None – Unrestricted
- Low – Must have a verified email on their Discord account
- Medium – Must be registered on Discord for more than 5 minutes
- High – Must be a member of the server for more than 10 minutes
- Highest – Must have a verified phone number on their account
Enable Server-Wide 2FA
When this option is enabled, all moderators and administrators must have two-factor authentication (2FA) enabled on their accounts to perform administrative actions like deleting messages.
This protects your server from malicious users who may try to compromise moderator or admin accounts and make unwanted changes.
You can find this option under “Moderation” in the server settings. Note that 2FA must be enabled on your own account before you can activate this feature.
Enable the Explicit Media Content Filter
By enabling the explicit media content filter, images and uploads that are considered inappropriate will be automatically detected and removed.
This allows members to share content while reducing the risk of inappropriate material appearing in safe-for-work channels.
You can find this option under “Moderation” in the server settings.
Explicit Media Content Filter
Filter Settings:
- Don’t scan any media content – Discord will not proactively scan media for explicit content
- Scan media from members without roles – Recommended setting for most servers
- Scan media from all members – Scans and removes explicit content from everyone
Create Rules for Your Server
Server rules should ideally be pinned in a welcome channel so new members see them immediately and avoid penalties such as bans. Discord doesn’t provide predefined rules, so you’re free to define your own.
Create Custom Channels
You can create a new category by right-clicking in an empty area of the channel list. The structure of your server is entirely up to you. Categories help keep things organized and make navigation easier for new users.
Voice channels can also be created via right-click and dragged into categories. Channel settings allow you to adjust bitrate and user limits, as well as assign specific permissions to roles or individual users.
If a member wants to manage their own channel, you can grant them permission to do so. They will only be able to manage that specific channel.
You can quickly create invite links by right-clicking a channel and selecting “Create Invite.” You can also edit the invite link to set expiration time, usage limits, and temporary membership.

Create Channel in Discord
Use Different Types of Channels
A successful server should give users the freedom to express themselves—even without elevated permissions. That means providing fun and feedback channels.
“Fun” channels could include topics like pet pictures or food photography. These help members connect through shared interests and spark conversations.
A feedback channel is also important. Members can suggest improvements or share concerns, and others can vote or discuss ideas. This fosters a sense of community and collaboration.
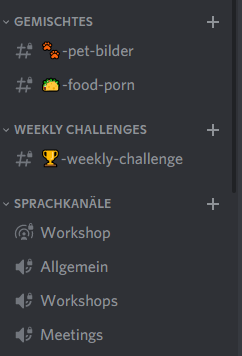
Different Types of Channels with Emojis
Improve Your Server with Emojis
Emojis are a useful but potentially risky design tool. The line between a clean layout and visual clutter is thin.
Use clear and meaningful emojis for channels to avoid confusion. For example, a pet channel should use a dog or cat emoji—not something unrelated.
Define Roles Clearly
As mentioned earlier, roles determine permissions—but it’s also important how they are named and earned.
Role names should match your community. For example, a gaming server might base roles on specific games. You can also create special roles for events, tournaments, or achievements.
Unique roles help members feel valued and encourage participation in community activities.
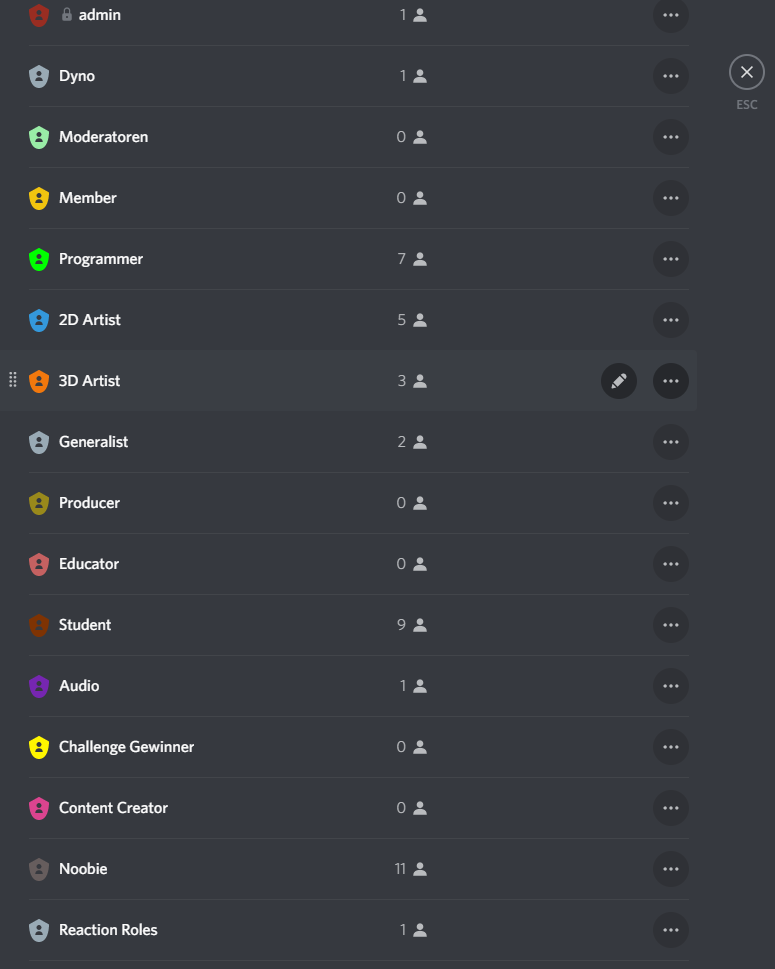
Possible Roles for a Server
Use Bots for Discord
It’s surprisingly easy to set up a bot on your Discord server. There are many guides available that explain the process step by step.
Discord even has a dedicated platform for bots: https://discordbots.org/
What Are Bots Useful For?
Discord bots are especially helpful for managing large communities, such as Twitch servers. They allow for efficient interaction with members.
Beyond music bots, many offer administrative features. You can execute commands in chat to ban users, assign roles, or play music—much faster than navigating menus.
How to Install a Bot
Using the website mentioned above, you can browse various bots and choose one that fits your needs. Click “View” to review its features before installing it.
Use the “Invite” button to add the bot to your server. It’s recommended to grant all requested permissions during installation to avoid issues with commands.
Commands vary depending on the bot, and there is no universal guide. However, most bots are designed to be simple and intuitive. Commands like !ban or !mute are commonly used.
After installation, the bot will appear in your member list like a regular user.
More articles

Technology
Alan Turing: Life, Work and Legacy of the Father of Computer Science
Alan Turing invented the foundations of modern computers, cracked the Enigma and was persecuted for it. Who was the man without whom there would be no AI?

Game Development
Bullet Hell Games – Chaos, Precision, and Game Mechanics Explained
What are Bullet Hell Games? An explanation, examples like Cuphead and Vampire Survivors, and the key characteristics of the genre.
Ready to get started?
Let’s start your project.
We appreciate your interest in working with us. Whether you have an idea, a proposal, a question, or need assistance in another area, we’ll get back to you quickly—within 24 hours.
Free initial consultation
Response within 24h
No commitment
Contact
Get in touch
Opening Hours
Mon – Fri, 9:00 – 17:00Response Time
Within 24 hours