Discord: Start an Activity
How to level up the team spirit in your company!
Software, Art
Blender is a free 3D program that allows you to create 3D and 2D models. These models can later be animated as well. There are many free models available on the internet that you can download. This small tutorial shows how to open a 3ds file in Blender.
In older versions of Blender, it was possible to open a 3ds file under the "Import" option. Unfortunately, this feature is no longer available in newer versions. To still open the 3ds file in the latest version, it needs to be converted into a new file. For this, the older Blender version 2.79 is required. Older Blender versions can be downloaded from this link.
Once the Blender version has been downloaded, it can be opened. In the workspace, delete all objects. These can be selected by right-clicking and deleted by pressing the "x" key.
To insert the 3ds object, select "File" in the top left.
Then click on "Import" and select "3ds." Choose the desired 3ds file from the folder.
Once the 3ds file is opened and the object is in the workspace, click on "File" again. Under "Export," select "FBX" file, as Blender can open FBX files.
Open the latest Blender version and delete all objects in the workspace. The camera and light do not necessarily need to be deleted. Now, open the converted object by going to "File," "Import," and selecting "FBX."
The converted object no longer has the textures it originally had. These textures can be added back. To do this, click on the "Shading" tab in the top center. This will open a tab where you can manually add the textures. To create a new material, click on the plus sign in the middle if no material is present.
Under "Base Color," you can change the color of the material. If the downloaded object had an additional PNG to make it appear metallic, it can be added through an "Image Texture." To insert it, press Shift + A and type "Image Texture" in the search bar.
Place the Image Texture next to the Principled BSDF. Click "Open" to load the PNG with the color or, for example, a wood texture. Connect the yellow dot on the "Color" of the Image Texture to the yellow dot on the "Base Color" of the Principled BSDF.
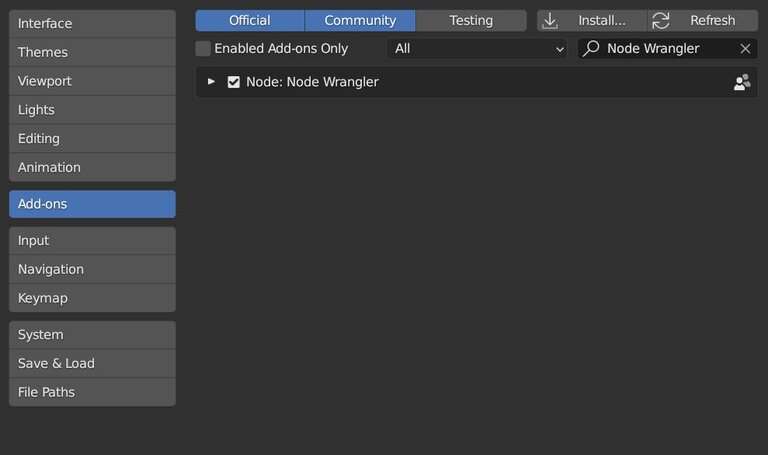
If there are multiple PNGs for the object, then the free Node Wrangler add-on is helpful. It can be found under Edit in Preferences. In Preferences, go to Add-ons and enter "Node Wrangler" in the search bar at the top right. Then, check the box for it and close the preferences.

To insert the 3ds object, select "File" in the top left. Then click on "Import" and select "3ds." Choose the desired 3ds file from the folder.
We hope you like our article and would like to invite you to share your thoughts and questions on the topic with us. If you have any questions, comments or feedback on the content of this article, please don't hesitate to let us know in the comments section. We're always happy to hear from our readers and engage in meaningful discussions about game development.
Just ask us anything you want to know and we'll do our best to provide the answers you're looking for. Thank you for your support and we look forward to hearing from you!
How to level up the team spirit in your company!
Unity modernizes the user interfaces and functionalities for developers. UIToolkit is intended to be a simplified solution for UI element creation and…
The Unreal Engine 5 sets new standards in terms of photorealistic graphics. New rendering technologies like Nanite play a decisive role in this. But…
Write comment